Pinstriping getting started
Hand-Painted boiled down to the essentials
pinstriping techniques for beginners – Real questions from people picking up a brush for the first time — covering brushes, paint, practice habits, and clearcoat — answered the way a striper would tell you across the shop bench. These pinstriping techniques for beginners will help you start your journey.
Getting Started
What is pinstriping, exactly?
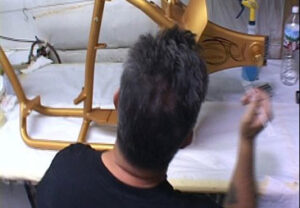
Pinstriping is the art of painting thin, flowing lines — and sometimes more elaborate scrollwork or designs — freehand with a brush, traditionally on cars, motorcycles, helmets, and signage. It’s done by hand, without tape or stencils, which is what separates true striping from vinyl or masked-off paint lines.
Understanding pinstriping techniques for beginners is key to mastering the craft.
Do I need to be a good artist to start?
No. You need steady hands, patience, and a willingness to practice the same strokes over and over. Line control is a learned motor skill, much like handwriting or playing an instrument. Artistic talent helps with design later on, but the foundation is muscle memory.
With the right pinstriping techniques for beginners, anyone can create stunning designs.
What’s the very first thing I should buy?
A quality pinstriping brush (a size #0 or #1 mack series 10 sword brush is a common starting point), a can of One Shot or similar sign-painter’s enamel in a single color, some practice panels, and reducer/thinner for cleanup and brush conditioning. you’ll learn faster focusing on one good brush and one color. (note Rust Oleum from Home Depot is a cheap option to practice with. I do not recommend using it on cars, but is a good option to practice until you’re ready to pinstripe on cars then I would suggest using one shot)
For effective pinstriping techniques for beginners, focus on learning the fundamentals first.
How long does it take to get good at this?
Most stripers say it takes 3-6 months of daily practice to paint a confident, consistent line, and a few years to develop a personal style and handle complex layouts smoothly. There’s no shortcut — the brush teaches you over time. Again, it’s all about muscle memory and getting that flow from the brush the paint and your hand it will all come in time
Pinstriping techniques for beginners emphasize the importance of regular practice.
Brushes & Materials
Mastering Pinstriping Techniques for Beginners
What brushes do pinstripers use?
Traditional pinstriping brushes are squirrel-hair quills, usually a size #00 up through #4. Brand names like Mack, Andrew Mack & Son, and Steve Kafka are the gold standard. A #0 or #1 Mack series 10 sword pinstriping brush is the most common all-purpose size for learning long flowing lines.
The right brushes enhance your pinstriping techniques for beginners.
Why squirrel hair instead of synthetic brushes?
Natural squirrel hair holds an enormous amount of paint relative to its size and tapers to an extremely fine point, which lets you pull long, consistent lines without constantly reloading the brush. Synthetic brushes don’t hold an edge or paint load the same way, so they’re rarely used for fine striping work. But a mix of blend and natural hair can be good for some jobs
Choosing the best materials can significantly improve your pinstriping techniques for beginners.
How do I take care of my brush?
Never let paint dry in the brush. After each session, work the paint out with the appropriate paint thinner, dip in neatsfoot or mineral oil reshape the tip with your fingers, and store it flat or in a brush box. A well-maintained brush can last for years.
What paint should I use to start out?
One Shot, Ronan or alphanamel lettering enamels the traditional choice and what most beginners start with — it flows well off a brush, has a long open time to correct mistakes, and lays down a glossy, durable line. Some stripers also use enamel-based striping paints from other sign-supply brands. (you can use Rust Oleum Enamel from Home Depot it’s a great start when you’re practicing, I wouldn’t suggest using it on the car just use it to practice with Has a great flow, easy to Purchase Everyone has a Home Depot down the street)
Technique & Practice
How should I practice?
Start on a flat practice panel (piece of glass, sheet metal, or an old hood works fine) mark off a grid or centerline (with an omni chrome pencil). Practice pulling long straight lines first, then gentle curves, then S-curves, teardrops, and scrolls. Many stripers practice the same handful of strokes daily for weeks before moving to a real panel. Consistency of practice matters more than session length.
Practicing these pinstriping techniques for beginners will help refine your skills.
What’s the proper hand and body position?
Most stripers use a “pinky” or finger as a guide point against the surface for stability, keep the wrist relatively loose, and move the whole arm rather than just the fingers for long lines. Standing or sitting where you can see the full line, you’re about to pull — not just the brush tip — helps keep lines straight. Here’s a video of pulling a long line down the side of a car with a Norris trickster
Utilizing proper body mechanics supports your pinstriping techniques for beginners.
How much paint should be on the brush?
Load the brush fully, then “tip it off” on your palette or a clean section of panel to remove excess and form a fine point. Too much paint causes blobby, uneven lines; too little causes skipping. You’ll find the right load through repetition. The consistency will come with practice and knowledge of how the paint the paint will flow different according to temperature in the area that you live in So this is just something that has to be learned again it’s just muscle memory
Achieving the right paint load is critical in your pinstriping techniques for beginners.
How do I fix mistakes in a line?
While the paint is still wet, a small cloth wrapped over your fingertip (sometimes called a “wipe-out” tool) dipped in Denatured alcohol (Found at Home Depot) can lift a mistake cleanly. Most enamel striping paints stay workable long enough to fix errors before they set. (Do not use denature alcohol on Open Automotive Base Coat)
Learning how to correct lines is vital to mastering pinstriping techniques for beginners.
Clear coating & Durability
Do I need to clearcoat over a pinstripe?
No — it’s not necessary. One Shot is a very durable enamel on its own, and roughly 95% of cars on the road today are modern vehicles that never get clear coated after a pinstripe job. As long as the stripe is taken care of properly — hand washed and never blasted with a pressure washer — it will hold up well without any clear over it.
Many beginners wonder about the necessity of clear coating in their pinstriping techniques for beginners.
Can I clear over One Shot if I want to?
Yes. While it isn’t required, One Shot is a solvent-based sign enamel that is generally compatible with automotive clearcoats once it has had adequate time to cure Use one shot Hardner (Add up to 10% by volume of 1 Shot #4007 Hardener to the lettering enamel. Mix the hardener into the paint before adding any reducer) — typically at least 24 to 48 hours, longer in cooler or more humid conditions. Always test compatibility on a scrap panel first, since clear formulations vary by manufacturer.
Consider how to enhance your designs using clear coats with your pinstriping techniques for beginners.
If I skip the clear, how durable is the stripe really?
Very durable, with normal care. The biggest threat isn’t everyday washing — it’s a pressure washer. Direct high-pressure spray, especially up close, can lift or chip an uncleared stripe. Hand washing or a gentle rinse keeps it intact for years.
A well-applied hand-painted stripe demonstrates effective pinstriping techniques for beginners.
Does clearing change the look of the line?
Slightly. Clear can add a touch of gloss and depth, and on metallic or matte clears it can shift the line’s sheen. Many stripers actually prefer the raw look of cured enamel without clear — and given how durable it already is, that’s a purely aesthetic choice rather than a durability one.
How long should a hand-painted pinstripe last, with or without clear?
With proper application and reasonable care — keeping it away from pressure washers and harsh chemicals — a hand-painted stripe can last for years whether it’s cleared or left bare. Clear coating adds a bit of extra protection against UV and abrasion, but it’s a bonus, not a requirement.
With good care, your pinstriping techniques for beginners can result in lasting designs.
Building Skill & Confidence
Refining Your Pinstriping Techniques for Beginners
Should I learn on a real car right away?
It’s best to spend real time on practice panels first. Many stripers do their early paid or favor work on motorcycle fenders, helmets, or small panels before tackling a full car, since mistakes are cheaper to fix and the smaller scale builds confidence.
Practice panels are essential for improving pinstriping techniques for beginners.
How do I develop my own style?
Study classic stripers’ work, copy their layouts as practice, and pay attention to what feels natural in your own hand — tighter scrolls, longer sweeping lines, certain color combinations. Style tends to emerge naturally after the fundamentals are solid, not before.
Developing a personal style follows mastering pinstriping techniques for beginners.
What’s the biggest mistake beginners make?
Rushing past the fundamentals. Skipping practice time on basic strokes to jump into full designs almost always shows up as shaky, inconsistent lines later. Slow, deliberate practice early on pays off in speed and confidence down the road.
Understanding basic strokes enhances your pinstriping techniques for beginners.