In the realm of automotive customization and fine-line artistry, few tools carry the weight of…
The Art of the Pull: 5 Steps to Mastering Consistent Lines in Automotive Pinstriping
In the realm of automotive customization, the "pull" represents the fundamental movement that separates a novice from a master craftsman. It is the continuous, fluid motion required to create a single, unbroken line that follows the contours of a vehicle’s body. Unlike modern vinyl graphics, which are printed by machines, hand-painted pinstriping possesses a distinct character: a human touch characterized by subtle nuances and a depth of color that only high-quality enamel can provide.
For veterans like Tony at astripe.com, who has been refining this craft since 1987, the pull is more than a technical maneuver; it is a display of precision and muscle memory developed over decades. Achieving a consistent, tapering line requires an intimate understanding of tool dynamics, paint viscosity, and physical stability. The following guide outlines the essential steps to mastering this foundational technique.
1. Equipment Selection: The Tradition of Mack and 1 Shot
The quality of a pinstriped line is inextricably linked to the tools used to create it. Professional pinstripers rely on a specific set of traditional materials that have remained the industry standard for nearly a century.
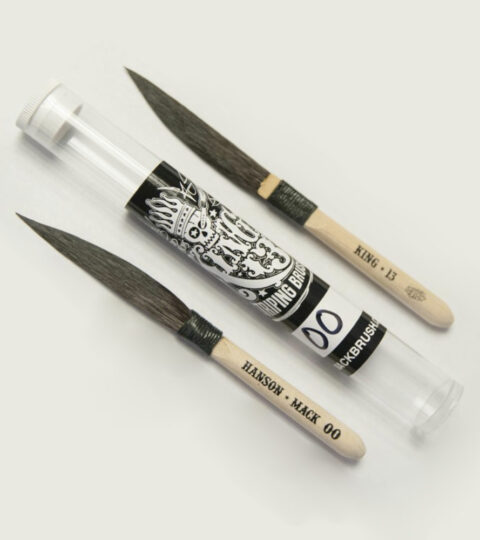
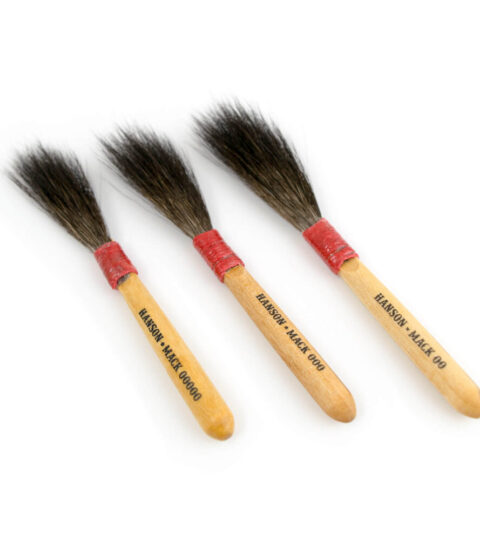
Select a professional-grade brush, such as a Mack Series 10 or Series 20. These brushes are meticulously crafted with finely tapered squirrel hair bristles, which are designed to hold a significant volume of paint while maintaining a sharp point. The long bristles act as a reservoir, allowing for the long, continuous "pulls" seen on classic hot rods and custom motorcycles.
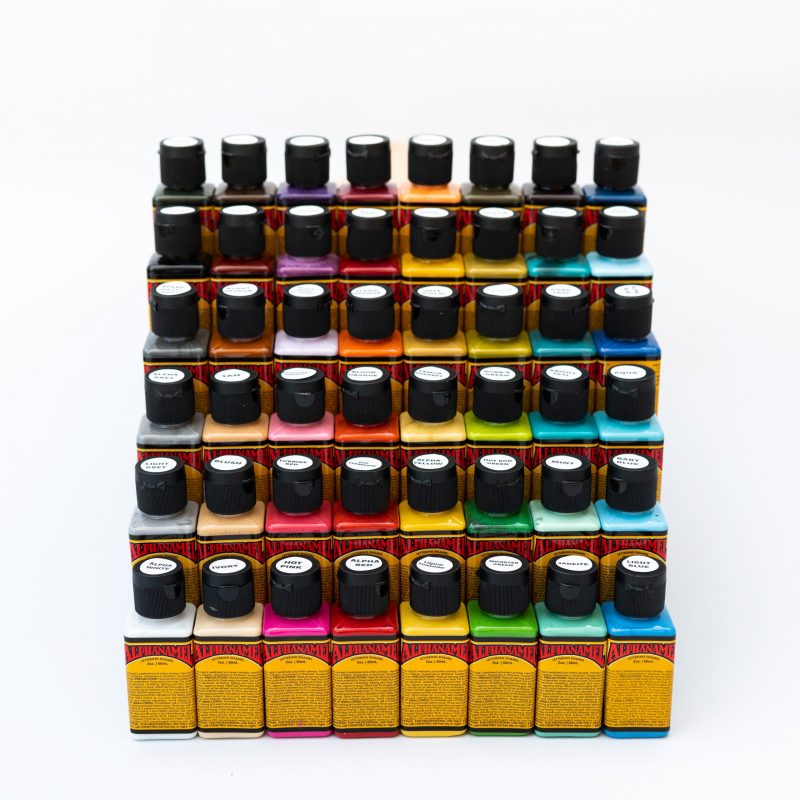
Equally important is the choice of pigment. Use 1 Shot Lettering Enamel, a high-quality oil-based paint known for its superior flow and vibrant opacity. This enamel is formulated to glide effortlessly across surfaces, providing the necessary "open time" to complete a long line without the paint drying mid-stroke. You can find a comprehensive selection of these professional materials at the Pinstriper.com store.
The Pro's Essentials Checklist
- Brush: Mack Series 10 for dependable paint hold and clean, controlled pulls.
- Paint: 1 Shot Enamel for strong flow, opacity, and working time.
- Layout: Tape for setting guides and spacing before the first line goes down.
- Fine Detail: Lettering Quills for smaller accents, touch-ups, and tight decorative work.
2. Brush Loading and Paletting
Before the brush touches the vehicle, it must be properly prepared. This process, known as "loading" or "paletting," ensures that the paint is evenly distributed throughout the bristles and the brush is shaped for a precise strike.
- Pour a small amount of 1 Shot enamel into a clean mixing cup. If the climate is particularly warm or cold, adjust the viscosity with a small amount of reducer to ensure the paint "flows" rather than "drags."
- Submerge the bristles of your Mack brush into the paint, ensuring the hair is fully saturated up to the ferrule.
- Transfer the brush to a palette, which can be a piece of magazine paper or a dedicated glass surface.
- Draw the brush across the palette in a series of strokes, turning the brush between your thumb and forefinger. This action removes excess paint and aligns the bristles into a flat, sharp "chisel" edge.
- Repeat the paletting motion until the brush produces a clean, consistent line on the palette. This step is critical; a poorly loaded brush will result in "railroad tracks" or a line that breaks prematurely.
Use a dependable sword striper that matches the length and feel required for the work. For artists who want the same traditional style of tool discussed here, the Alien Deathhawk brush is a strong example of the specific brushes available through Pinstriper.com.
3. Establishing the Anchor: The Role of the Pinky and Ring Fingers
Stability is the foundation of a consistent line. Without a firm "anchor" to the vehicle’s surface, the hand will naturally tremble, leading to jagged or uneven strokes.
Position your hand so that the pinky and ring fingers rest lightly but firmly against the automotive surface. These fingers act as a guide and a stabilizer, similar to a bridge in billiards. By sliding these fingers along the body line or a pre-marked guideline, you create a physical reference point that keeps the brush at a consistent distance from the surface.
This anchoring technique allows the hand to move in a controlled arc while the wrist remains relatively locked. In his 35 years of experience, Tony of Astripe has emphasized that the weight of the hand should be supported by the anchor fingers, allowing the thumb and forefinger to focus solely on the subtle pressure required to vary the line's width.

4. Execution: The Physical Action of the "Pull"
The "pull" is not a movement of the fingers, but a movement of the entire arm and, in many cases, the upper body.
- Align your body so that you can move in the direction of the line without interruption. If you are striping the side of a car, ensure you have a clear path to walk or slide alongside the vehicle.
- Place the brush on the starting point with gentle pressure. The width of the line is determined by how much you "squat" the brush: applying more pressure spreads the bristles, while lifting the brush tapers the line.
- Commence the pull by moving your entire arm backward in a smooth, continuous motion. Maintain a constant speed; moving too slowly can lead to wobbles, while moving too quickly may cause the paint to thin out or skip.
- Watch the path ahead of the brush rather than the brush itself. By focusing on the target or the pre-marked line, your hand will naturally follow a straighter trajectory.
- Maintain the anchor of your pinky and ring fingers throughout the duration of the stroke. As you reach the end of the line, slowly lift the brush to create a clean, sharp taper.
A practical advantage comes from using high-quality paint. Better enamel flows more evenly off the brush, stays workable longer, and helps the pull feel smoother from start to finish, especially on longer lines where consistency matters most.
For examples of complex pulls, such as those found on custom-painted hot rods, observe how the artist navigates curves and body lines without breaking the flow.
5. Developing Muscle Memory through Repetition
Consistent pinstriping is a result of muscle memory. The hand and brain must be trained to work in unison, instinctively responding to the resistance of the paint and the contours of the surface.
Professional artists often practice on glass or metal panels for hours before attempting a client’s vehicle. This repetition allows the artist to internalize the "feel" of the brush and the specific behavior of the enamel. As seen in the history of pinstriping, masters like Von Dutch and Ed Roth achieved their level of fame through thousands of hours of dedicated practice.
- Practice basic straight lines of varying lengths to master speed and pressure control.
- Graduate to "C" and "S" curves, focusing on maintaining a consistent line width through the turn.
- Experiment with symmetry, attempting to mirror a design on the opposite side of a panel. This is often the most challenging aspect of the craft and requires a high degree of spatial awareness.

The Enduring Appeal of Hand-Painted Craftsmanship
Mastering the "pull" is a journey that requires patience and a commitment to traditional methods. While digital tools and vinyl cutters offer convenience, they cannot replicate the soul and authenticity of a hand-painted pinstripe. The subtle imperfections and the way the light catches the raised edge of the enamel are marks of a genuine artisan.
Whether you are a seasoned professional or a passionate hobbyist, the pursuit of the perfect line is a tribute to a rich heritage of automotive art. By utilizing the correct tools, such as professional-grade brushes, and focusing on the technical foundations of anchoring and arm movement, you can preserve the human touch that makes custom vehicles truly captivating. For those seeking inspiration or professional services, the work of Tony Pinstriper serves as a testament to what can be achieved through mastery of the pull.
Workshop Style & Supplies
For artists who want their gear to reflect the same authenticity as their work, Pinstriper.com also carries apparel and shop-ready extras that fit naturally into the custom culture. These pieces work well in the workshop, at cruise nights, and at car shows while keeping the focus on traditional craftsmanship.
- Pinstriper.com Logo T-shirt for an easy everyday shop shirt with a direct connection to the brand.
- Pinstriped Baseball Jersey for a stronger statement piece with a classic custom look.
- Classic Retro Auto Shop Tee for a casual option that fits right in at the bench or out at an event.
- For more brushes, paint, and setup materials featured throughout this guide, browse the pinstriping brushes, pinstriping paint, pinstriping tape, and lettering quills categories.
Comments (0)